

![]()
TLDR: A general walk through of what the solution does, how to implement it and overview of how it may be better than using nested dependent runbooks.
Prior to using this solution, Microsoft shared version 1 of the Start/Stop solution with the general public. This included parent runbooks calling child runbooks and schedules and dependency on Automation accounts and identities and permissions… and you get the idea. Totally doable, don’t get me wrong but me personally, I was a little too lazy to go through how these runbooks worked and all that jazz. I actually ended up creating my own custom runbook(s) to manage my VMs, both in the cloud and on prem. This new solution though uses App Insights for holding the analytics for Start/Stop VMs, Logic Apps as the coordinator, a Storage Account for telemetry data, and Azure Function App as the executioner itself. Did I mention…it ALSO includes email notifications, and a DASHBOARD! All of it basically done through the portal itself. No code.
It does seem a little daunting at first -at least it was to me – but it’s actually quite simple to setup and provides a low-cost automation option for folks who want to optimize their VM costs. So now let’s go over how to implement it.
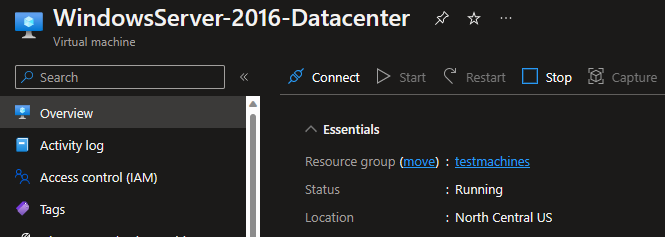
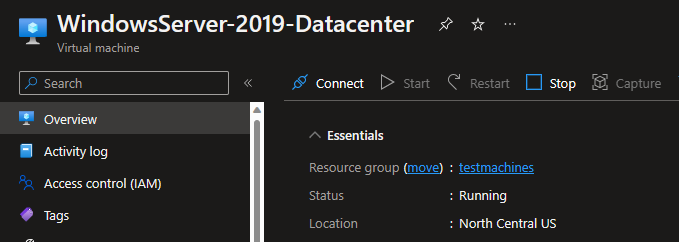
Notes: We will be testing this with 3 Azure VMs: Ubuntu18.04, Windows Server 2016, and Windows Server 2019. This walkthrough will be about the Start / Stop function targeting specific VM’s. I’ll probably write a blog on the sequence option later on.
1.) Creation.
I like to organize my resources in Azure and so first, I create a Resource Group where it will hold the entire solution. We’ll call it ‘StartStopV2Solution_Demo‘.

We have nothing in there. Let’s get some stuff added. For this we can either find the solution in the marketplace or go here for it too since it is mentioned in the Microsoft Doc. Here is the link: startstopv2-deployments/README.md at main · microsoft/startstopv2-deployments (github.com). I went through the GitHub site and from there, there is an option to deploy to your Azure environment.
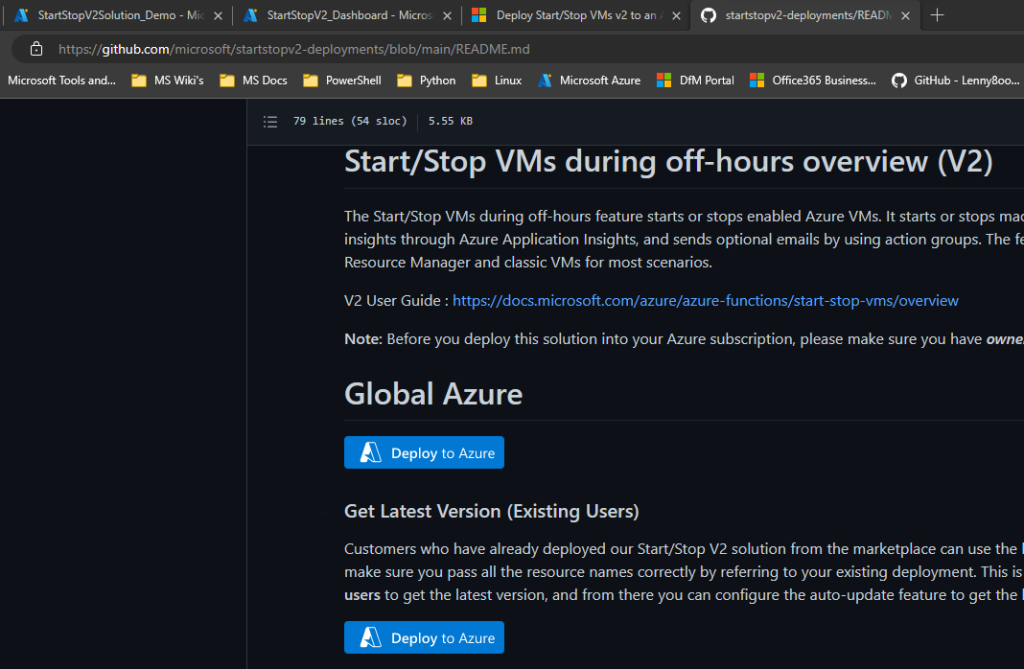
2.) Deploy it.
It will ask you to sign into your account where it will be deployed on. You will then be taken to your Azure tenant and see this:
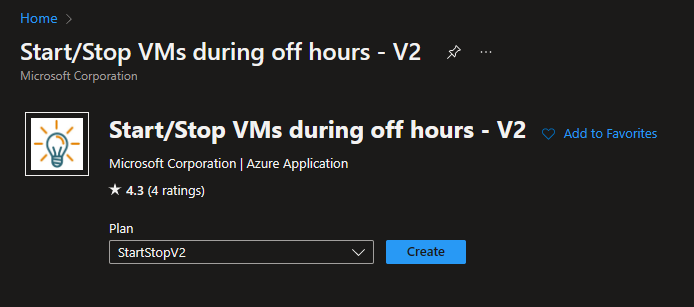
Click on Create.
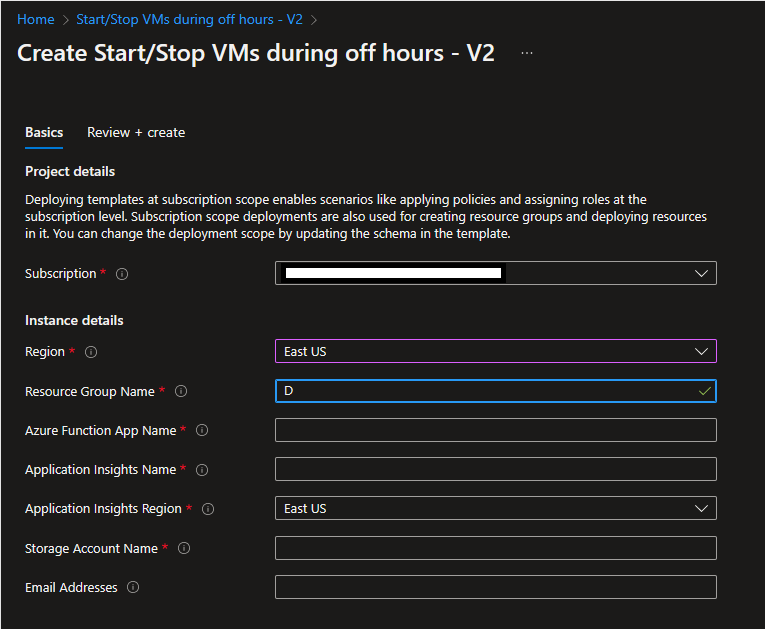
3.) Configuration.
Select the correct subscription. In my demo, I will be creating this instance in the same region as the resource group which is East US region.
I was actually confused with this part since I thought you had to manually create each individual piece prior to entering their names in this section. Nope, just enter the name you want for each resource and it will create it after with those names.
I assign it some solid names that identify what the resource is and what it’s for, like this:
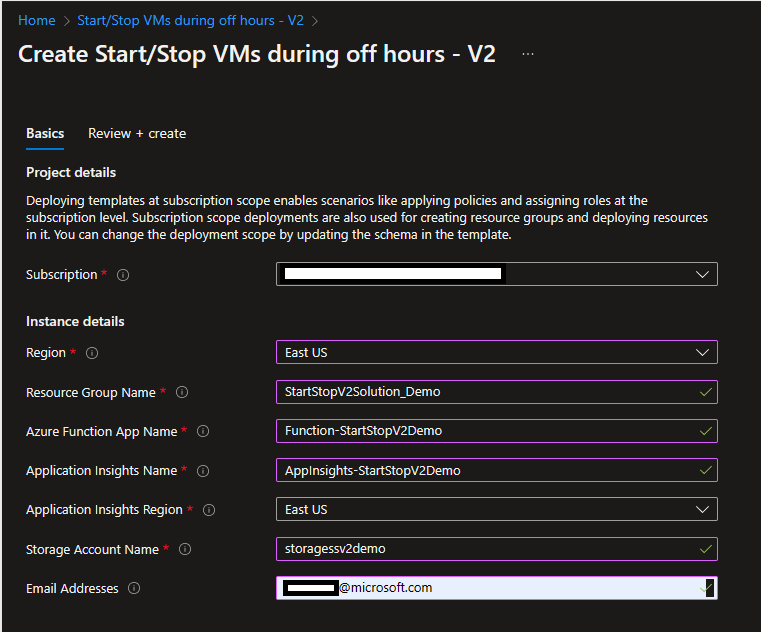
Click on Review + Create and if all is good and validated, Create it.
4.) Adding Machines.
The resources get created relatively quickly. About 2 minutes maybe? You should see something like this:

Now, let’s say for example, I have 3 machines I want to manage. They need to start up at 7 AM every day and shut down at 6 PM because you want to save money. For the scheduling, we will go to our Logic App resources in the resource group.
Select Logic App called ‘ststv2_vms_Scheduled_start‘ to schedule the machines to start every day at 7 AM. Before we even add the machines, enable the app. Otherwise, if you add the machines first, then enable the logic app after, it WILL run it once and you will unintentionally, start or even worse… stop your VMs on the spot. Happened to me during testing. So, enable the solution first.

After it has been enabled, on the left panel, under Development Tools, go to Logic App Designer.
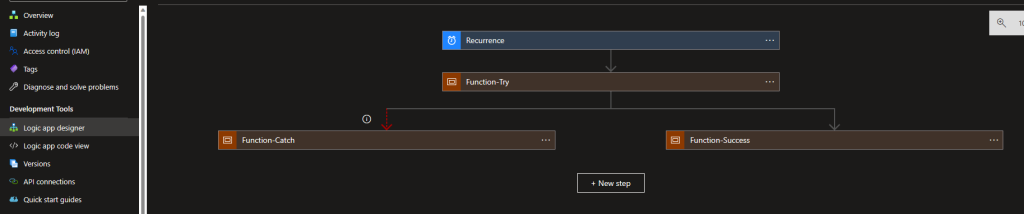
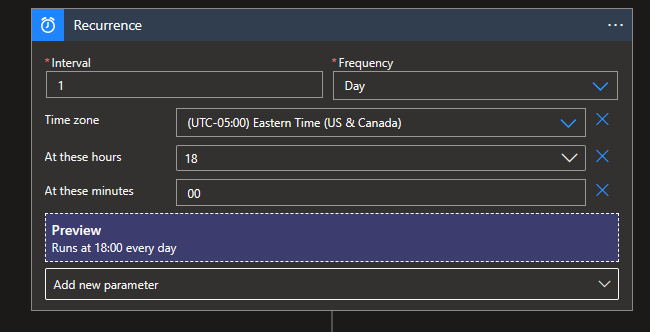
In the designer page, select the top option called Recurrence. This is the schedule your VMs will follow. Select your desired interval, frequency, time zone, hours and minutes. It even provides you a little preview 🙂
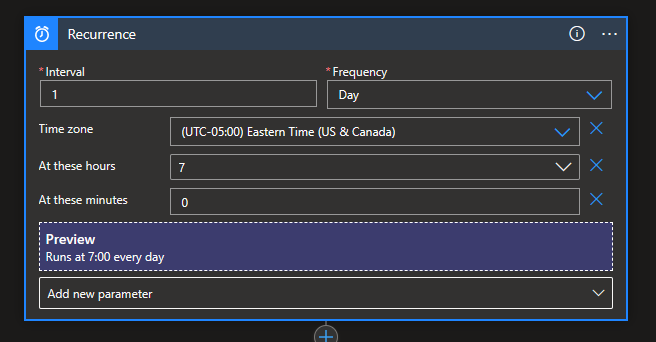
Ok, so now at 7 AM every day, in EST time zone, this will get triggered, and it will turn on my VMs… but wait… where are my VMs?
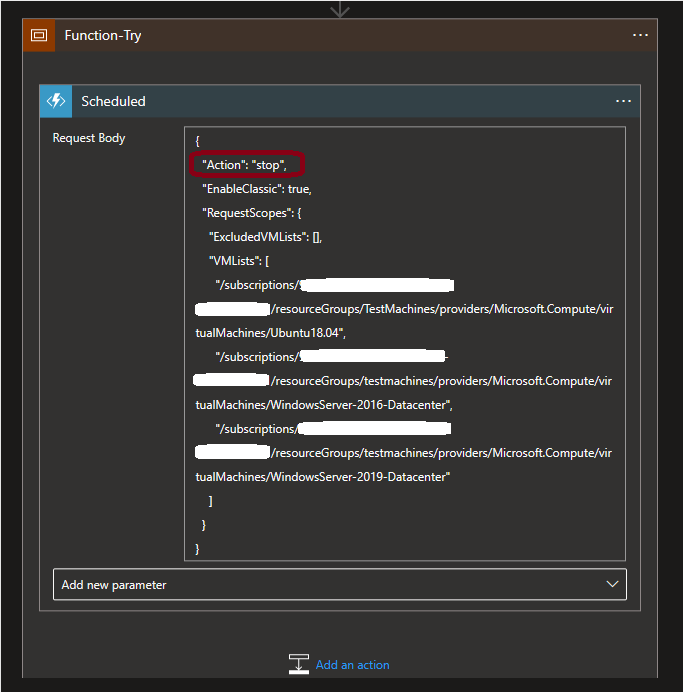
Below the Recurrence box, there is another box called Function-Try, this will define the action, parameters and resources affected. Select it. We then see this, a little sample:
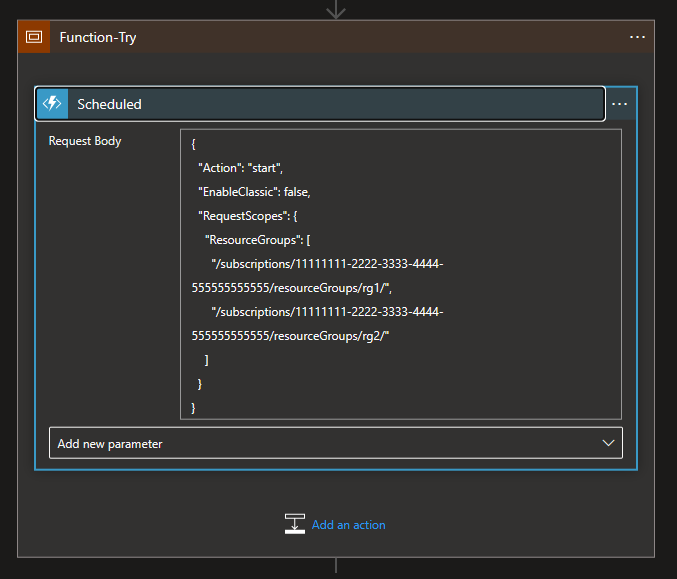
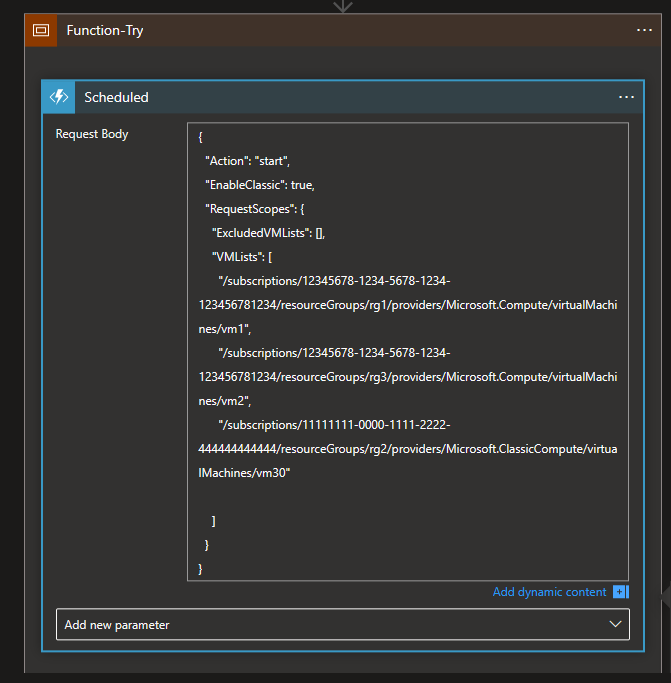
Delete whatever is in the Request Body. We will be copying a sample from a Microsoft Doc and pasting it in there. Go here: Deploy Start/Stop VMs v2 to an Azure subscription | Microsoft Learn. Go to step 5. Under that step, you will see 5 samples and some explanations as to what they do. We will copy the fifth sample. I prefer this sample as it’s very simple.
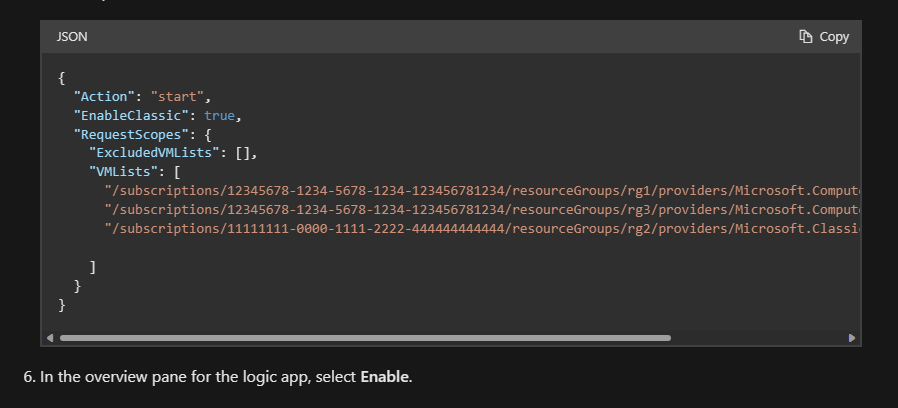
So, copy it and then paste it in the request body back in the logic app. Like this:
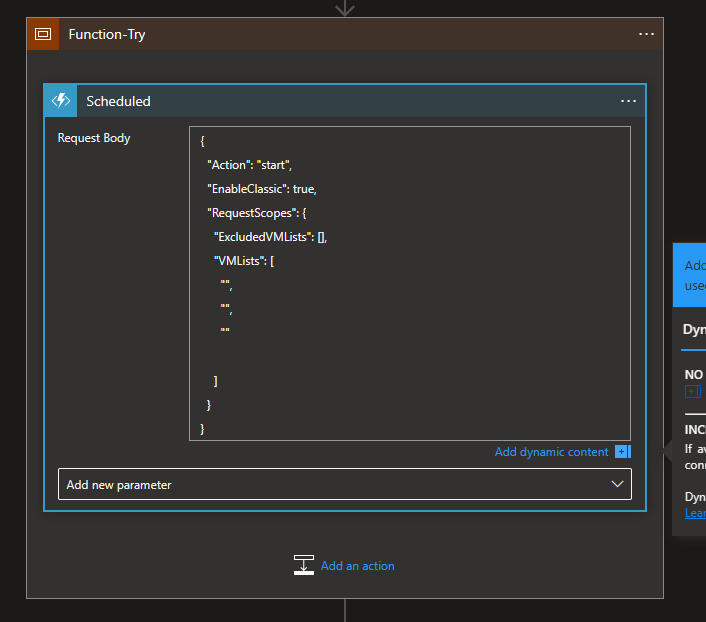
You see that element called ‘VMLists’? That is where we will add our own VM’s and their resource ID. So, under that element, delete those 3 sample VMs. Should look like this afterwards:
Now, let’s go get our VMs. Go to your VM and find the properties under Settings. Copy the Resource ID. After you’ve copied it, go back to the Logic App designer page, and paste it between the quotes, where the previous sample resource ID were. Do the same for the other VMs. Should look like this:
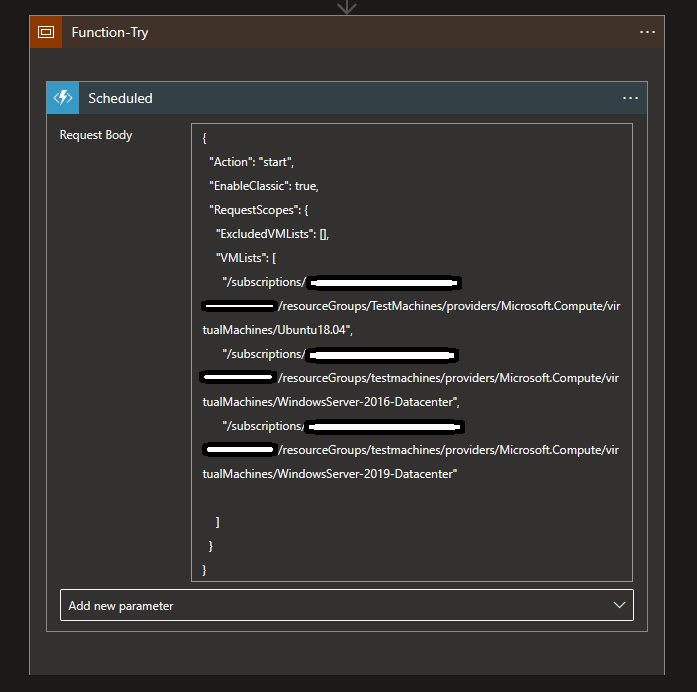
So, at 7 AM, the action – ‘start’ will run against these VMs that we manually defined. Now click Save.
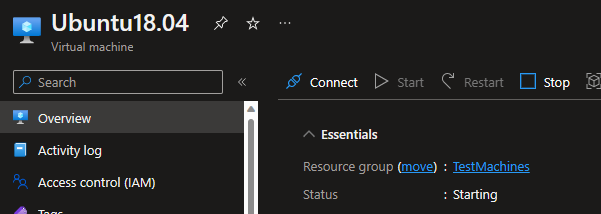
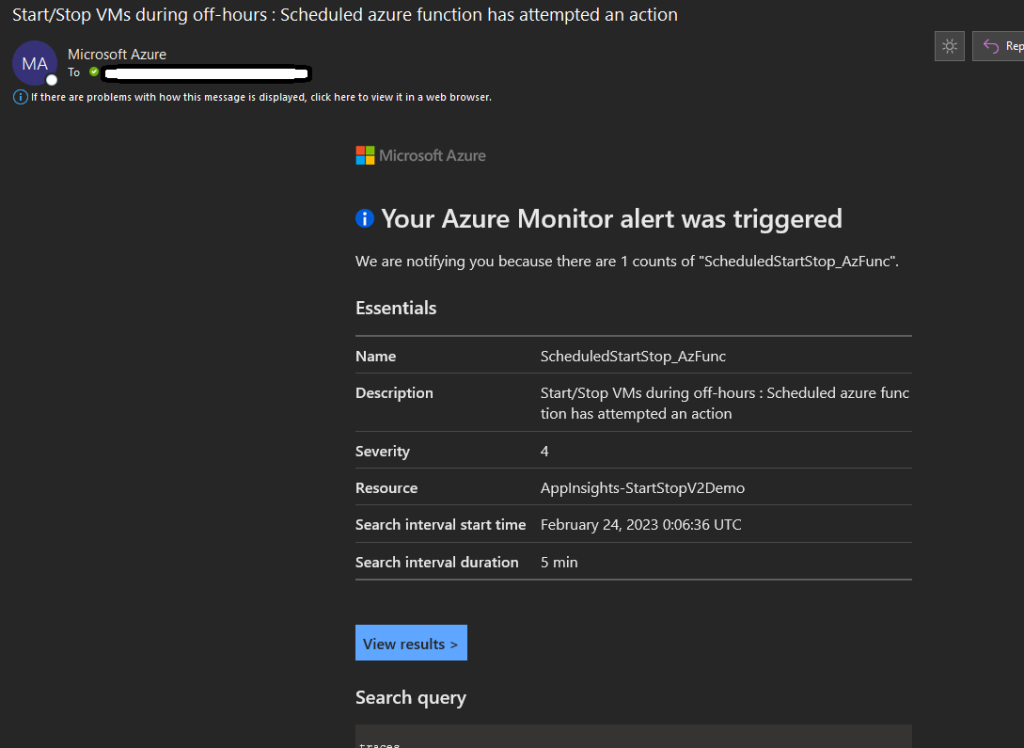
***I accidentally forgot to enable it prior and so it ran automatically and started my VMs***
We get an email notification a couple mins after:
5.) Scheduled Stop VMs.
Great, now we have scheduled our VMs to start at 7 AM EST. Now we also have to plan to shut them off. So back in the resource group, click on the other Logic App called: ‘ststv2_vms_Scheduled_stop‘.
Again, Enable the app first. Then head over to Logic App Designer. Give it the schedule you want.
We will essentially do the same thing as seen in Step 4, but we will make one change in the box Function-Try. So, copy the request body from the other app (ststv2_vms_Scheduled_start) and paste it there. In the element called ‘Action‘, change the word from ‘start‘ to ‘stop‘. That’s it.
Now Save.
For this case, I enabled it after. Don’t do that. Again, it ran automatically, and my machines are now off. Imagine doing that to dozens, hundreds, potentially thousands of production VMs.

And there ya go. You have successfully scheduled the start and stop of your VMs.
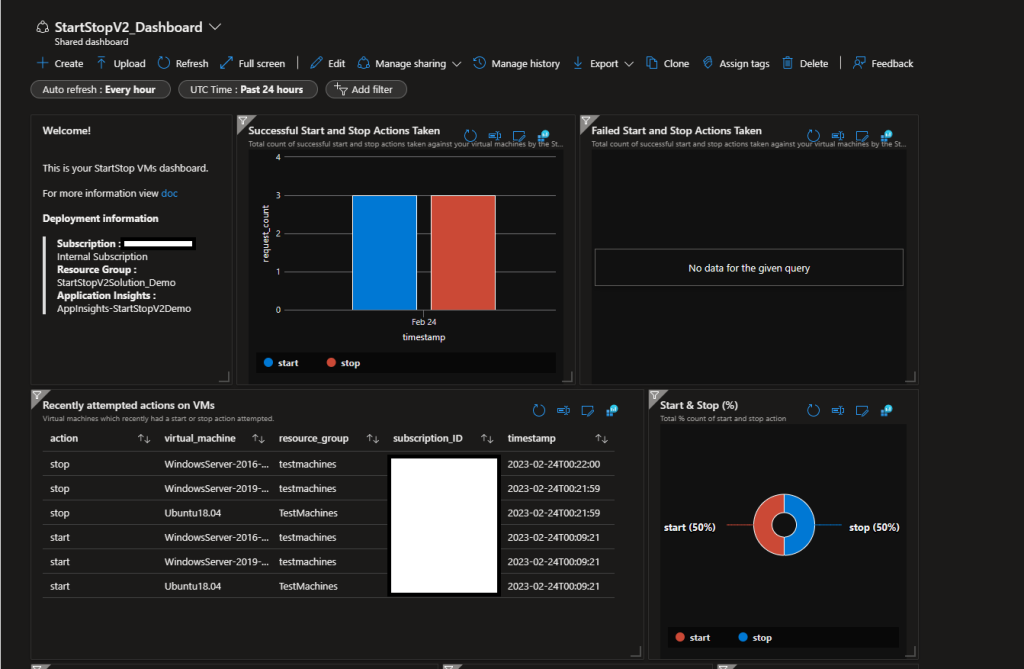
Other features: The neat thing about this solution is that you receive email notifications for when it gets triggered, there is a dashboard included, and it just works. Not much coding to do really.
Final words.
This is a great solution for someone learning how to leverage Azure’s newest technologies to manage their VMs. It touches on multiple products, is simple to implement, you have visibility as to what happens, and most importantly of all, saves you money.
References:
Overview of the Solution: Start/Stop VMs v2 overview | Microsoft Learn
Prerequisites: Start/Stop VMs v2 overview | Microsoft Learn
Deployment: Deploy Start/Stop VMs v2 to an Azure subscription | Microsoft Learn
Sample we copied from (5th Sample on step 5): Deploy Start/Stop VMs v2 to an Azure subscription | Microsoft Learn
Dashboard and Email Notification: Manage Start/Stop VMs v2 | Microsoft Learn


Nice read, I just passed this onto a colleague who was doing a little research on that. And he actually bought me lunch as I found it for him smile Therefore let me rephrase that: Thanks for lunch!
Your articles are extremely helpful to me. May I ask for more information?
Thank you for comment. What other information do you need?